Our favorite time of year has arrived - Spring! The flowers are blooming, the sun is shining, and all the bright and vibrant flavors of Spring are filling our tables! But most importantly, this is the season for Brunch, and brunch is not complete without some bubbly and a goat cheese spinach basil and prosciutto quiche !
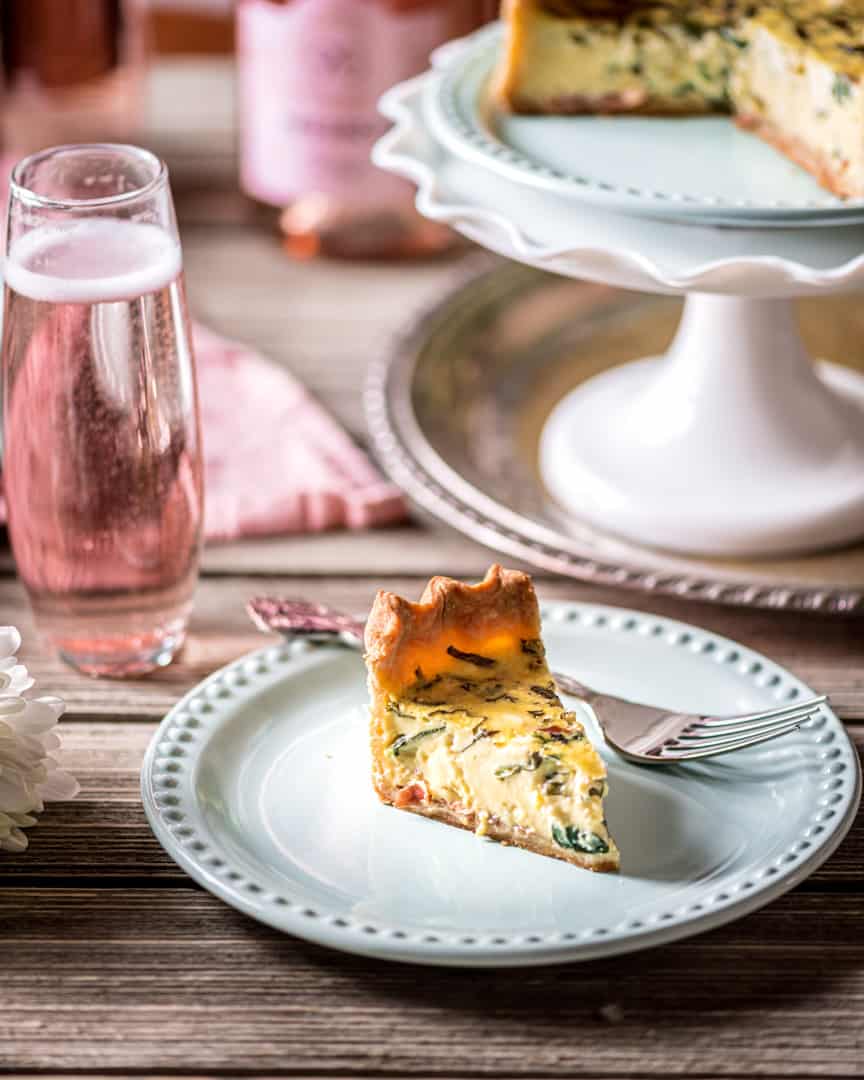
Are you looking for brunch ideas for the upcoming Easter weekend?? Well, we got you covered!
We teamed up this Spring with 90+ Cellars to bring you the perfect pairing for Easter Brunch or any Spring weekend brunch for that matter. Here is a delicious Goat Cheese, Spinach, Basil and Prosciutto Quiche paired with this new and very special Prosecco Rosé release from 90+ Cellars that will be the highlight of the season!
Let's Talk About Quiche Baby!
Let me start off by saying that we love a good quiche! If a quiche is on the brunch menu, you better believe it will be on my plate! Although quiche is nothing new to any Brunch-goer, it's always exciting to dig into these savory pies! A well-done quiche is not only very tasty, but also lends itself to a beautiful presentation piece for big breakfasts or brunches.
And even better, this recipe can be made ahead of time and easily reheated in the oven without losing any of its silky custard texture or crispy and flaky crust!
How to make a GREAT quiche!
An excellent quiche is not difficult, but has a few key components that should be noted to achieve the result of a restaurant-quality quiche. These include the texture of the crust, the silky custard, and the balance of flavors.
The Ultimate Flaky Crust
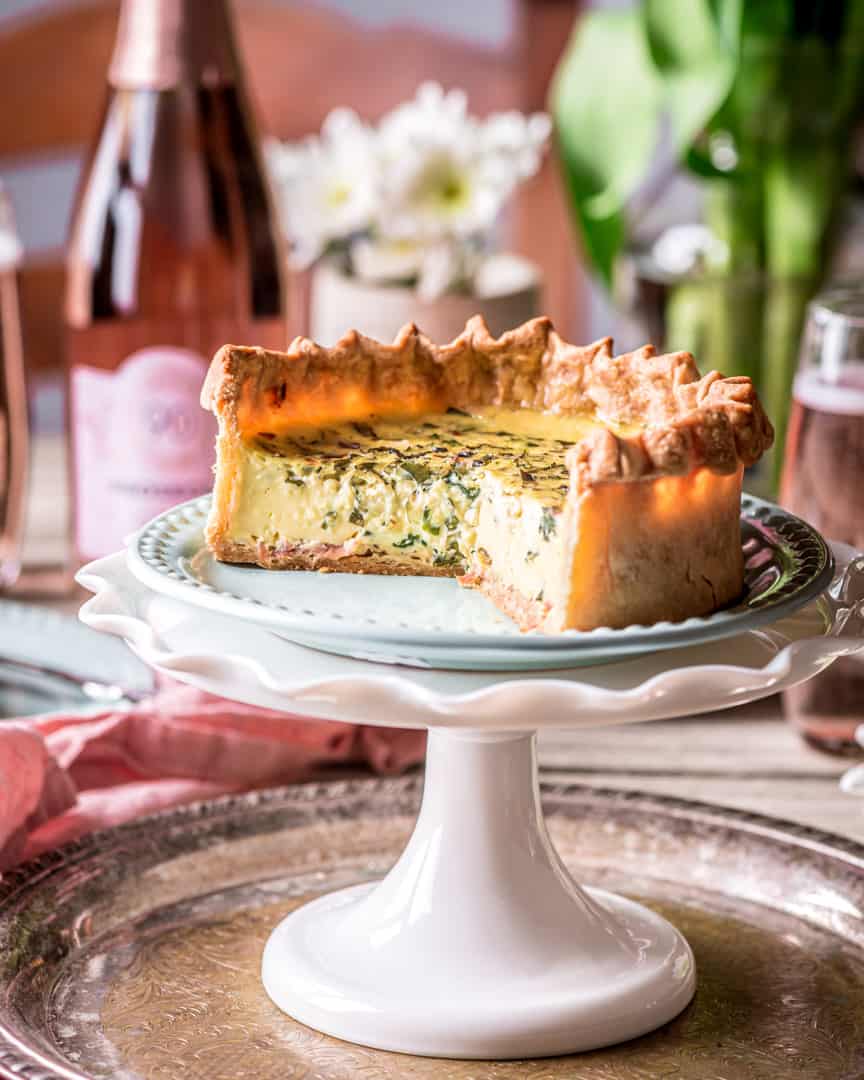
The dough is literally the foundation of your quiche, and this version is forgiving, reheats well and tastes great. Yes, it is a bit time-consuming, but most of this is just waiting patiently for the crust to cook properly before filling. As long as you follow the steps, you should have no problems here! Be patient and give your crust the opportunity to become what it was intended to be and you will not be disappointed.
COLD BUTTER: To make the flaky crust, you must first have very VERY cold butter. Not frozen-like-a-rock butter, but colder than 5 minutes removed from your fridge butter. If your butter is not cold enough, your dough won't turn out as flaky. To achieve this, we take the stick of butter from the fridge and place it in the freezer for about 10 minutes before measuring the ingredients for the short-dough. While the butter quite literally chills out, you can prepare the rest of your dough ingredients, which requires measuring (preferably weighing) all-purpose flour, salt, water, and an egg yolk.
USE A FOOD PROCESSOR: We have found that the easiest way to make the dough is to use a food processor to mix the flour, butter and salt before kneading by hand with the egg and water.
Once you have pulverized the butter with the flour and salt, you can turn it onto a board and add the egg yolk and water. Start kneading and you will find that the dough should not be super dry, but also not very sticky. Usually ours seems dry until you knead it well and it comes together without additional flour or water. But if necessary, you can add a bit more flour or a touch of water as needed.
Once you are done kneading, the dough needs to chill out again and rest in the fridge for about 20 minutes before you roll it out. It can also stay in the fridge for a few hours if you have other things to do.
ROLL OUT DOUGH TO ABOUT ⅛ INCH THICK: Although the crust is very important, it isn't the best part of the quiche (debatable, we know), so rolling the dough out to a nice even layer will result in the perfect quiche crust ratio.
USE A 6X2 INCH ROUND PASTRY MOLD: To get your quiche to be a free-standing pie that you can easily slice and serve rather than something you have to dig out of the bottom of a pie dish, we recommend using round pastry molds such as THIS ONE. Using the pastry mold is preferred, but if you wish to bake this in a pie dish or tart pan instead, you may want to line it with parchment so you can easily remove and slice it.
BLIND-BAKE THE CRUST:
Blind-baking the crust is a necessary step to ensure that the crust is baked before adding the custard. Blind-baking involves baking the crust at 350°F in the mold with something to weigh it down for 25 minutes. We use dry beans, but pie weights are a thing if you want to use those. Because the crust and custard bake at different temps, it is critical to blind-bake the crust so that you don't end up with an unbaked, raw or soggy crust at the end. Don't skip this step!
After the blind bake, you will finish off the crust with another cook to ensure the final product will have that crisp, flaky texture in the crust - even on the bottom. Just follow the steps and be patient - the rewards will justify your work.
How to Achieve a Smooth and Silky Custard
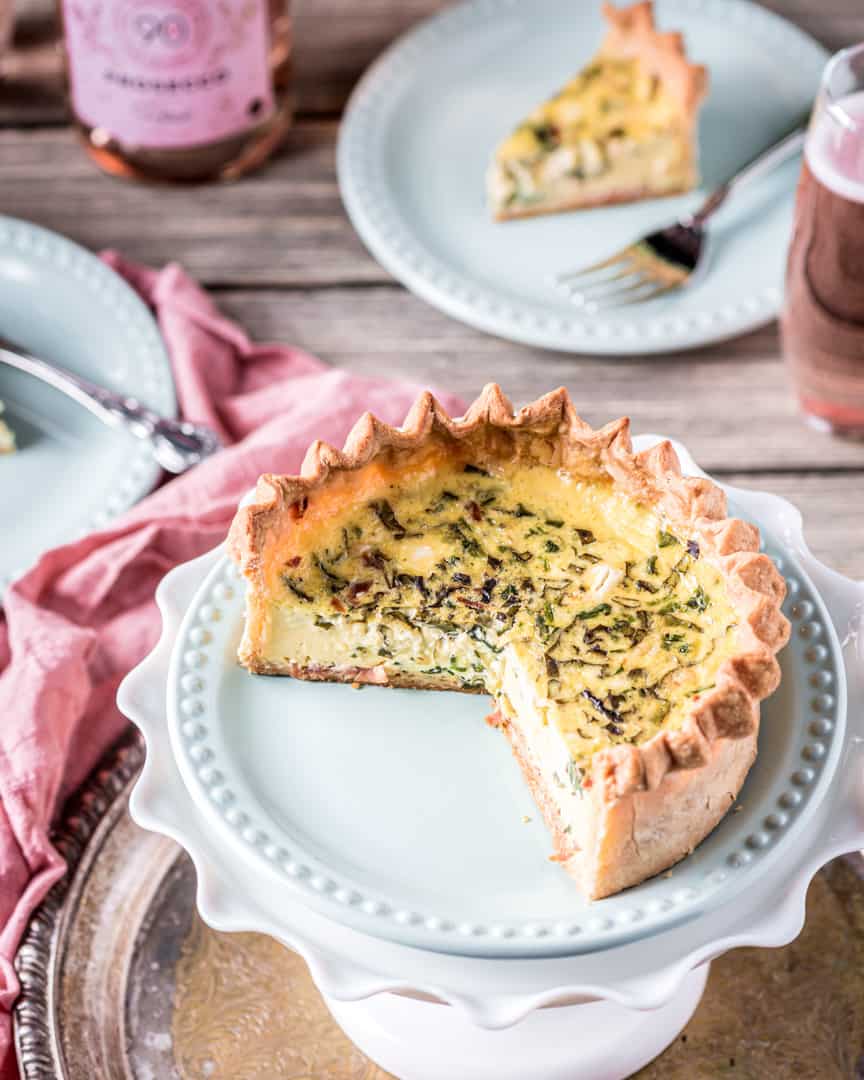
The custard is what makes a quiche either light and spectacular with a great taste and texture, or a heavy, ugly mess that isn’t worth serving. These ratios of milk, cream and eggs/yolks work perfectly for a finished product that is light, creamy and delicious. Making the custard is like buying the concert ticket - you need to follow instructions and do it correctly or you won't be seeing the show. After that, you can have fun by adding garnishes that suit your taste!
What should you put in the quiche?
Whatever you want, really! Although, we are quite partial to this combo of goat cheese, spinach, basil and prosciutto, you can add or remove whatever you want and play around with the flavors to achieve YOUR perfect quiche. A traditional (and the original quiche) Lorraine with bacon, leeks and Gruyere cheese is usually a crowd pleaser as well!
Fill it with what you like to eat, but we must advise you to not overfill it! Too much meat, cheese or any of the garnishes and your custard won’t have a chance to shine. You also want to layer the custard and garnish a few times during the filling process. Add some cheese, then garnish, then a ladle of custard - then repeat. Then repeat again until your pastry shell is filled. 3-4 times is plenty, but the intention is to keep the garnish floating in the custard and not sinking to the bottom crust. This may be a bit difficult to accomplish perfectly but try your best and you'll be rewarded when cutting into your finished quiche! Oh, and gently add your garnish and don't just drop big ol' chunks in like you are shark fishing.
And finally, you need to season the custard with a bit of salt, and pepper if you want, right before it goes into the oven. This is dependent on what garnishes you use as things like salty bacon or salty cheese will require very little salt to be added at the end.
Obviously this is one of those recipes that you can't (or shouldn't) taste before you fill your pastry shell so experience, intuition and common sense will help here. Write down what you do so you know how to adjust if yours comes out too salty or not quite seasoned enough. But the window is pretty open so you should not have any major disasters.
Baking the Quiche
Cooking the assembled quiche will, again, require some waiting tolerance. Your oven temp should be 250°F and no hotter! Don’t be tempted to turn the heat up – your quiche is cooking and just requires time to set at low heat. Once it does, you’ll have that perfect golden top and a delicate custard that melts in your mouth.
The time may vary here from about 30 to 50 min depending on how full your quiche is. We fill ours about 1 and ¾ to 2 inches inside the crust that raises about ¼-1/2 inch above the sides of the mold. The true test of doneness is what we like to call "The Jiggle Test." Gently jiggling the pan your quiche is baking on will be the best indicator telling you your quiche is done. When cooked perfectly, your quiche custard will barely jiggle in the very center. But it should still have a jiggle to it...don't bake it into rigor mortis.
Make the Quiche in Advance
When making quiche for a breakfast or brunch menu, we always make it a day or two before. Because of the makeup of quiche (and the brilliance of this particular short-dough), it is the perfect make-ahead and reheat dish for a stress free morning prepping for brunch! And, we can't emphasize "always make it a day or two before" enough as proper quiches like these do take time.

Reheating Instructions
Preheat your oven to 300°F. To reheat, place the whole quiche on a parchment lined baking tray. Place in the oven for about 20 minutes, or until the quiche is warm throughout. The quiche will stay good for up to 5 days, but is best eaten within the first 2-3 days. Slice, pour a glass of bubbly and enjoy!
Speaking of Bubbly....
Pairing good food with good wines is our love language! A beautiful sparkling wine is so lovely with a quiche brunch! We love a sparkling rosé wine, or a Prosecco Rosé, with this delicious Goat Cheese Basil and Prosciutto Quiche.
Enjoy!
We hope you enjoy this Spring wine pairing with our Goat Cheese, Spinach, Basil and Prosciutto Quiche. If you give it a try, leave us a comment below or tag us on Instagram @cooking_with_wine.

If you like this recipe, check out some of our other popular recipes below:
- Coq au Vin – Chicken in Red Wine
- Crunchy Chicken with White Wine Lemon Butter Sauce
- Summer Pasta (Pasta D’Estate)
- Blood Orange Elderflower Rosé Granita
- White Chocolate Raspberry Bundt Cake
📖 Recipe

Goat Cheese, Spinach, Basil and Prosciutto Quiche
Ingredients
For the Dough
- 225 g all-purpose flour (about 1¾ cups)
- 113 g unsalted cold butter (1 stick)
- 5 g kosher salt (about 1 tsp)
- 1 large egg yolk
- 50 g water (¼ cup)
For the Custard
- 300 g milk (1 ¼ cups)
- 300 g heavy cream (1 ¼ cups)
- 4 large egg yolks
- 4 whole large eggs
Additions
- 100 g soft goat cheese (about 4 oz)
- 2 cups spinach
- 8 large basil leaves
- 4 slices prosciutto
- 1 shallot - finely diced
Instructions
PREPARE THE DOUGH
- Take the stick of butter from the refrigerator and put it in the freezer for 20 minutes prior to making your dough. When ready, slice the butter into tablespoon sizes (8 pieces) or smaller - I cut a stick of butter in half lengthwise then cut 8 pieces - making 16.

- Add flour, salt and cold butter to a food processor and pulse until the butter pieces are small - like rice or slightly larger at most.
- Have a few tablespoons of extra flour handy in case you need it. If it is very humid when making your dough you might need a bit of flour - this should not be a dry dough, but shouldn't be exceptionally sticky either. Put the dough on a surface - a bench or large cutting board - make a well in the middle and add the egg yolk and water. Use a fork to break the yolk and begin mixing in a little flour at a time.

- Once about half of the flour is incorporated, knead until it is smooth and fully incorporated. Once finished, shape into two discs about ¾ inches thick and wrap in plastic. Refrigerate (rest) the dough for at least 20 minutes or up to a couple of hours.

- Preheat the oven to 350ºF.
- When dough is done resting, roll out each disc on a cutting board or surface to about ⅛ inch. You may need flour for this to make sure the dough doesn't stick. We use a 6 inch pastry mold to form the crust. Either butter the inside of the mold or spray with nonstick oil. Flour under the mold and put the dough into the mold, pushing down on the sides to the bottom and gently forming a crust. Trim the excess (there will be quite a bit if your mold is short like ours) so you can work the edge of the crust for a pretty appearance.

- Once the bottom and sides are formed in the mold, create the edge of the crust using your fingers or any tool you wish to make an appealing shape/look. At this point, move the crust to your baking sheet lined with parchment paper to finish the process.
- Dock the dough: using a fork, poke holes on the bottom and a few on the sides so the crust can let air in while it bakes. Line the dough with plastic wrap, add pie weights or dried beans to fill the shell (almost all the way) and fold the plastic inward over the beans/weights and make sure the plastic wrap is inside the crust.


- Blind bake at 350ºF for 25 minutes. Remove from oven and remove the beans/weights from the dough. Then return to the oven for at least 20 minutes or until the crusts are slightly past golden brown. This dough is resilient and you don't want to leave it raw.
Make the Custard
- Make your custard while the crust continues to bake. Combine all ingredients for the custard and whisk thoroughly. Add a little (a pinch or so - maybe 2) of salt and some pepper for seasoning.

- Once the crusts are done, remove from oven and, using a pastry brush, coat the bottom and sides with your custard to fill the holes. Return to the oven for 3 minutes to seal the holes. Remove and cool completely while you prepare the additions. Turn the oven down to 275ºF and place the custard in the fridge while you wait.
FOR THE ADDITIONS
- You will want to keep all ingredients separate so you can add them in proportions you desire.
- For the spinach, heat a skillet on medium heat and add about 2 teaspoon of oil. When hot, add spinach and turn, flip and stir quickly for about 20 seconds until the spinach is wilted. Remove to paper towels to drain off most of the oil. Then chop the spinach into small pieces.
- In the same pan, add the prosciutto slices for about 15 seconds each, just enough to turn the fat from bright white to opaque. Thinly slice/chop the prosciutto as well.
- Chop the basil and shallots into small pieces, and crumble the goat cheese.
FOR THE ASSEMBLY
- Once the shells are cool, and still inside the pastry rings and on the baking sheet, you can assemble. Add a ladle full of custard and about some of each of your additions to the two crusts. The more gentle you are in this process, the better chance you will have of the additions not all sinking to the bottom of the custard. Continue the process until the quiche is full.


- Put quiche into the preheated (275ºF) oven. Check at 40 minutes and 5 minute intervals thereafter - this part is dependent on your oven and you will need to gently jiggle your pan that the quiche is on to make sure that it is set. It is done when the center is barely wobbly but not liquidy.
- Once done, remove, let cool and slice carefully and serve, or place in an airtight container in the fridge overnight and follow reheating instructions for serving the following day.



Leave a Reply