Please note: This post has been sponsored by Calphalon. All opinions are our own.
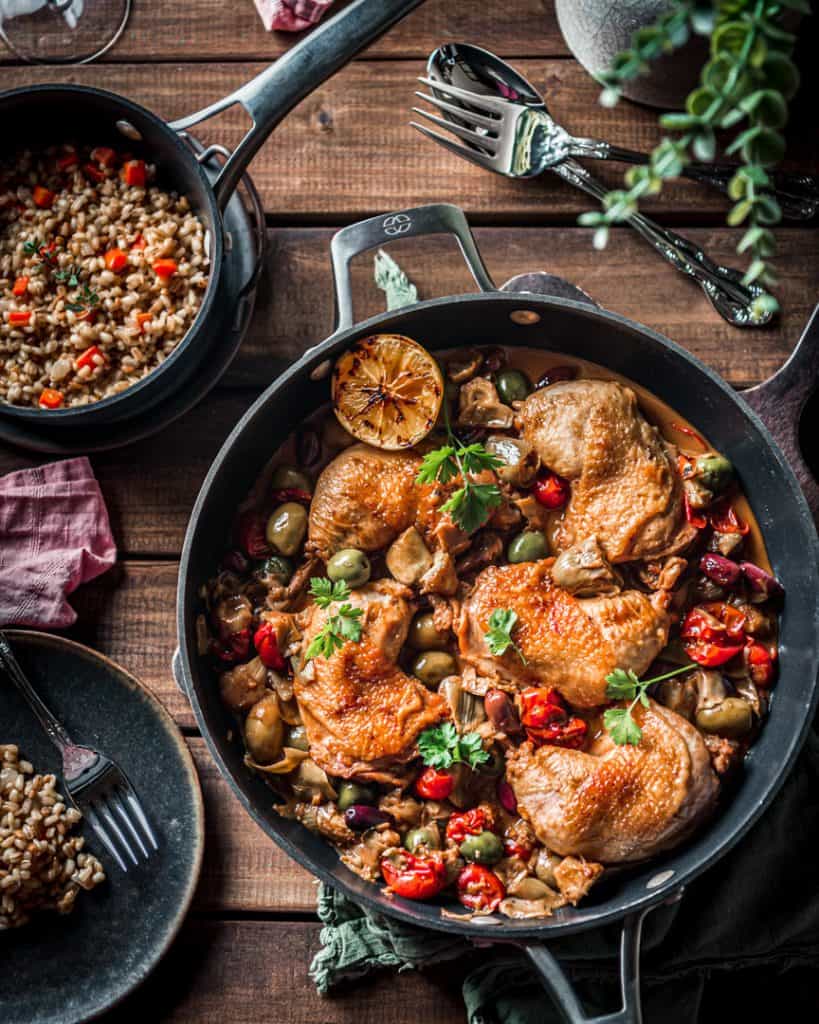
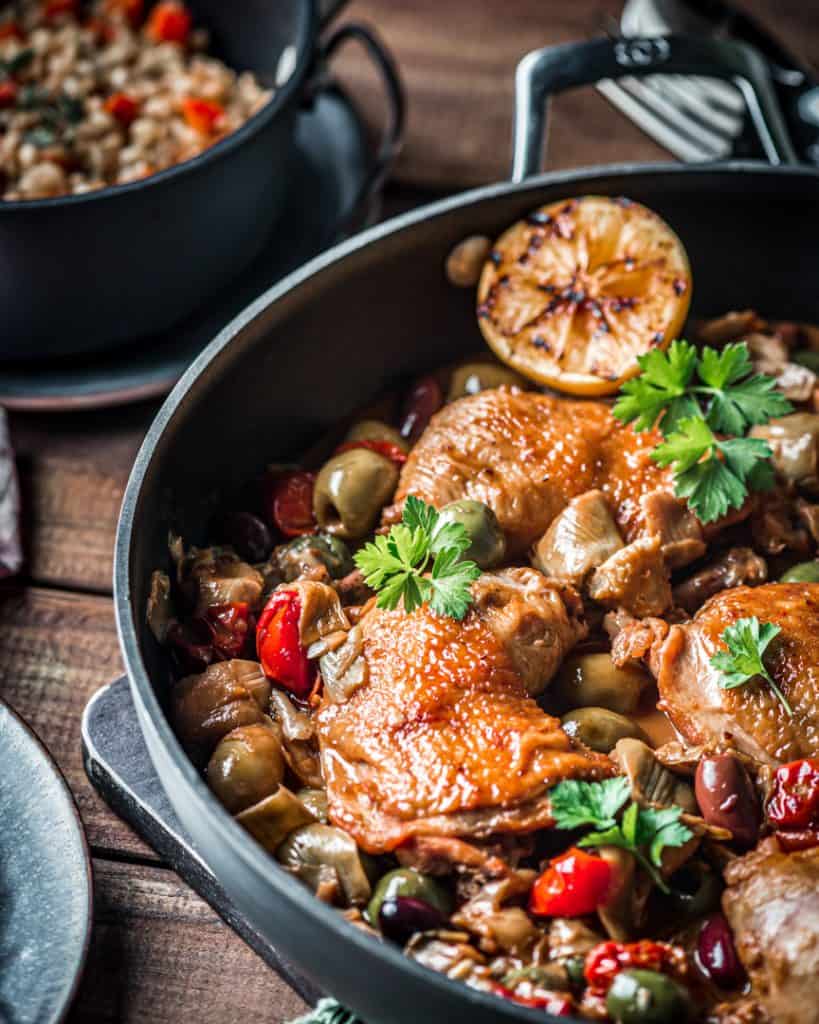
There are certain combinations of flavors that make our hearts so happy, and this Olive and Artichoke Braised Chicken has so many of these incredible tastes! We know you will absolutely love it too! Especially when combined with the Barley Pilaf, you have yourself a winning dish that the whole family will love!
What does it mean to Braise Chicken?
Braising is a technique of cooking that brings a ton of flavor to your final dish. It involves a combination of dry and wet cooking methods. You will first sauté your chicken in a pan (we used the Calphalon PremierTM Hard-Anodized Nonstick 12" Fry Pan) then you will finish it by partially submerging it in a liquid and cooking at a lower heat, in this case in the oven.
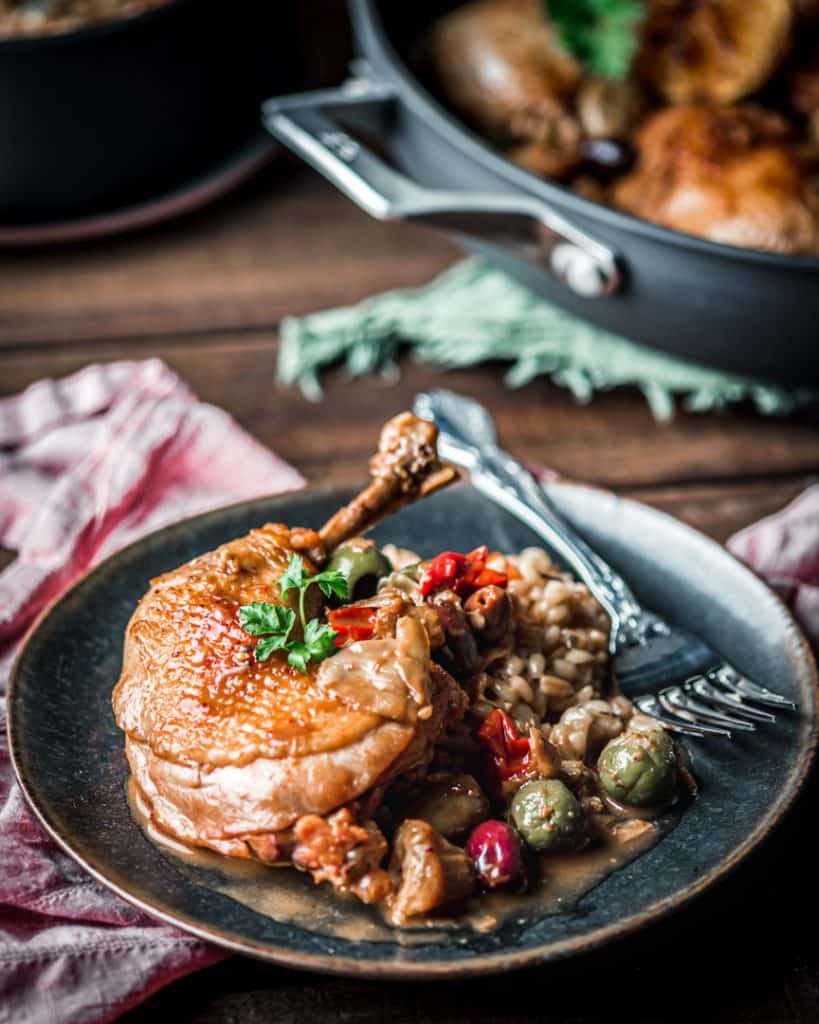
The results of braising are tender and juicy chicken meat packed with the flavors of the sauce that they were cooking in. The sauce itself is served with the dish as well, making this a convenient way to top off your chicken.
Let's face it... chicken doesn't really taste like much on its own and sauces make it significantly better.
Tips for Making this Olive and Artichoke Braised Chicken Dish
Braising is a fairly easy technique that any home cook can accomplish with ease. We add extra touches to this version that, in our opinion, enhance the dish significantly.
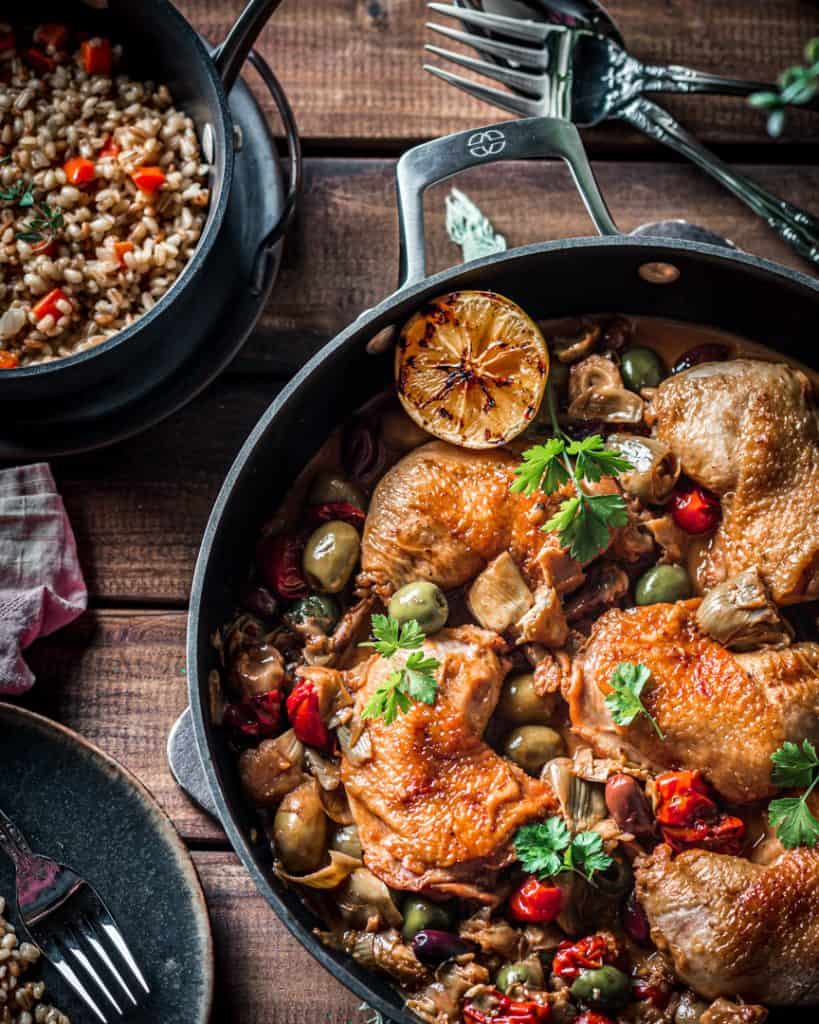
Getting a Crispy Skin
Let's talk about chicken skin. This is an ingredient that gets removed so much these days before the meat is even sold, or it is left on the plate and trashed.
Most people don't like soggy, fatty rubbery chicken skin. Seriously, who does??
But, surely at some point in your life you've experienced this magical part of the chicken, right? When it's crispy, golden, and packed with flavor. So, let's do it right in this recipe!
Sear the chicken first!
Searing the chicken in the pan first starts the epic journey to the perfect skin.
During the braising process when the chicken is absorbing all that saucy goodness, the skin will succumb to the juices and go back to its flabby ways. So there are a few things we discuss next to help with this.
Remove the chicken briefly to reduce the sauce.
Once the chicken is done braising, we pull the chicken out to reduce the sauce, which allows concentration of flavors without overcooking the chicken.
Also, removing the chicken allows you to get the sauce to exactly where you want so that you can finally perfect that crispy skin by broiling before serving.
The sauce should NEVER be considered a way to cover up and moisten dry, overcooked chicken. The sauce should have the flavor from perfectly cooked chicken as well as all of the other flavors you added to the dish ON PURPOSE! We are building an amazing sauce that will change an ordinary chicken into a 4-star dish that doesn't take that long - who wouldn't want that?
Broil the dish skin-side-up right before serving.
Once the sauce is at its perfect saucy state, place the chicken back in the dish with a bit of a stir, then place the entire pan immediately in a super-hot oven. We heat our oven to broil, but we place our chicken in the pan on the middle rack, so we are really not "broiling" as there is no reason to have the chicken right next to the heat source to achieve the crispy-skin results.
You will only need to leave it in the oven for 2-3 minutes before the skin begins to brown and bubble. Use your eyes and nose here and don't let it get too brown or begin to smoke and burn. Once you finish, you'll have nice crispy and incredibly FLAVORFUL chicken skin to eat with your sauce and chicken and barley. Pretty good concept, right?
Keys for a Flavorful Sauce
Now that you know how to achieve that crispy skin, let's talk about the sauce...
One technique that we use often to enhance the flavor of our dishes is to add a little bit of wine or other liquor while cooking. For this particular dish, we've included wine, port AND brandy! So consider this everyone's lucky day!
Flambé plays a big part in this dish. If you've never flambéed a dish, don't be intimidated. I mean, don't be a reckless cook either - you are, after all, starting a fire in the kitchen. But it is ON PURPOSE and it creates flavor and a pretty cool light show.
So, if you haven't flambeed anything, just read our tips below and follow the instructions. It may seem intimidating, but it's not as difficult as it may seem.
But we must caution you, fire is in fact HOT. It will burn you if you are not careful! Please use caution when flambéing anything.
Tips for Flambéing
- Use a pan with rounded deep sides and a long handle
- Always measure your brandy (or other alcohol) into a separate container and NEVER pour from the bottle
- Remove the pan from the heat prior to adding your brandy
- Your pan should be hot but not so hot that it is smoking
- If you have a range hood vent fan, turn it on. If you don't have a range hood fan, move your pan to a counter space that is open and away from anything flammable
- Do not lean any part of your body over the pan
- Keep a lid nearby in case the fire continues to burn for longer than 15 seconds and cover the pan to put it out.
Oh, don't hold your 1-year-old toddler on your hip while you do it, either (see above about being reckless). You can flambé with just about any spirit that has a high enough alcohol content to ignite (and even some wines).
The goal is to burn the alcohol off quickly, and leave behind a rich, deep flavor of the spirit you used for the flambé.
Don't forget the Barley Pilaf!
Finally, the barley pilaf is pretty awesome. I know many people have eaten or experienced barley in some way (not counting beer or whisky). But many haven't and this is a great way to cook this tasty grain. You can use this same technique with white rice, wild rice, quinoa, faro or just about anything similar to rice.

Technically, this is just a basic pilaf technique, but many pilafs are cooked in the oven. They don't have to be, and this isn't. This one we cook in a nonstick sauce pan (we use the Calphalon PremierTM 2.5 qt Sauce Pan with lid for this).
If you make a lot of risotto, you'll notice the similarities at the beginning. What you are trying to do by adding barley to butter and cooking for a few minutes before adding your hot liquid is building FLAVOR. Flavor=awesome and that's what we are doing here, right?
The barley is literally thirsting to absorb stuff - any liquid will be sucked up by this grain. When butter that has been used to sauté carrots and onions is what you drop the barley in, then you know what it will drink, and the result is a fascinating buttery flavor packed into the grain before adding chicken stock to complete the process.
We make this barely pilaf frequently and it never disappoints! The Olive and Artichoke Braised Chicken with Barley Pilaf is a killer combo of flavors!
A note about our cookware
We recently became part of the Calphalon Ambassador team and we are thrilled to share some of our favorite Calphalon cookware items with you in this post today and many more to come! For instance, we used several of the nonstick pots and pans included in the Calphalon Premier™ Hard-Anodized Nonstick 11-Piece Cookware Set to make this meal we shared here.
We have tried almost every piece of cookware available on the market, and we are thrilled with the durability and versatility of this set. We were able to flawlessly move through this entire recipe without the need for anything besides what was in this set.
If you have been following our journey for a while, you know by now that we will only recommend products to you that we ACTUALLY love and use. So if you are ready to update your cookware, head over to Calphalon and check out this set!
Enjoy!
We hope you enjoy this recipe for Olive and Artichoke Braised Chicken with Barley Pilaf as much as we do! If you give it a try, leave us a rating and a comment below. Or tag us on Instagram @cooking_with_wine.
If you love this recipe, check out some of our other popular recipes below:
- Crunchy Chicken with White Wine Lemon Butter Sauce
- Coq au Vin - Chicken in Red Wine
- Goat Cheese, Spinach, Basil and Prosciutto Quiche
- Summer Pasta (Pasta D'Estate)
- The Best Homemade Shrimp Scampi Recipe
📖 Recipe

Olive and Artichoke Braised Chicken with Barley Pilaf
Ingredients
For the Chicken
- 4 cups beef stock/broth, reduced in a saucepan down to 2 cups
- Chicken Hindquarters (Leg and Thigh, skin on and bone in)
- 1 tablespoon kosher salt
- 2 teaspoon ground white pepper
- ¼ cup olive or vegetable oil (50 g), enough to coat your pan
- shallot - minced
- garlic clove - minced
- 1 oz brandy (30g)
- 1 oz port wine (30g)
- 4 oz dry white wine (115g)
- cherry tomatoes (about 185g or 6.5 oz)
- 1 cup (160g) pitted olives - mixed varieties or your favorite
- 1 ½ cup baby or small artichoke hearts (240g)
- lemon - sliced in thirds
For the Barley Pilaf
- 1 ½ cups Pearl Barley (325g)
- ⅓ cup butter (80 g)
- 1 medium carrot (70g) medium diced
- ⅔ cup chopped onion (100 g)
- 24 oz chicken stock (680 g)
- 1 bay leaf
- 4 parsley stems
- 3 thyme sprigs
- salt and pepper to taste
- 2 tablespoon butter (40 g)
Instructions
REDUCE STOCK AND PREP INGREDIENTS
- Put the 4 cups of beef stock in a saucepan over high heat and reduce by ½. Meanwhile, prep the rest of your ingredients. This will take about 15-20 minutes.
SEAR THE CHICKEN
- Preheat the oven to 350ºF.
- Season your chicken with salt and pepper on both sides. Heat the oil in a large oven-safe pan to fit the chicken over medium high heat. Add the chicken and brown on both sides - about 2-3 minutes a side.
- Once the chicken has browned on both sides, turn the heat down to medium low and remove the chicken and drain off the excess oil - only leaving a small amount left in the pan.
- Add the shallots to the pan for about 30 seconds to sweat and then add the garlic for 15 seconds. Stir and then add the chicken back into the pan skin side up.
FLAMBÈ THE CHICKEN WITH BRANDY
- Put the stock in a saucepan over medium high heat to warm - just get the temperature to warm/hot). Once the chicken is added back, heat the pan back to medium high for 1 minute.
- Once hot, remove from heat and carefully add the brandy (SEE NOTES IN POST FOR SAFTY TIPS). Light with a long lighter and flambé without moving the pan. Once the flame is extinguished (approximately 10-15 seconds), shake the pan to make sure there isn't any more brandy to ignite.
ADD WINE AND REDUCE
- Return the pan to medium high heat and add the port and wine. Cook for about 5 minutes until the wine and port have reduced by about half and the alcohol smell is gone. This may take more or less time depending on how hot your stove is and the shape of your pan.
START THE BARLEY
- While the sauce reduces, start the barley.
- Rinse the barley in water to remove the u0022dust.u0022 Add the stock, bay leaf, parsley stems and thyme to a saucepan and heat to a simmer.
- Meanwhile, in another medium nonstick skillet, heat over medium heat and then add the butter. Once the butter has melted, add the carrots and sauté until they are almost tender but have just a little firmness in the center. Add the onion and cook with the carrots until translucent. Add the barley to the pan with the carrots and stir to completely to coat the barley with butter. Turn the heat to medium low and cook for about 5-8 minutes so the barley absorbs some butter.
- Strain the chicken stock into the pan with the barley and add some salt and pepper. Cover and cook for about 20 minutes on the stove on medium low. Check after 15 minutes to make sure your barley isn't too dry - if so add a little water and stir. After 20 minutes, add the remaining butter, taste for doneness and seasoning and adjust as needed. It should have a tender bite to it, but not be hard or completely mushy.
COOK THE CHICKEN IN THE OVEN
- To the pan with the chicken, add the tomatoes, olives, artichokes, three lemon pieces and the warmed stock - just enough to come to the top of the chicken without covering the skin.
- Bring the chicken and contents to a boil and immediately remove from the heat, cover and put into the preheated oven for about 20 minutes. Remove and take the temperature of the chicken with a probe thermometer. Once the temperature reaches 157-160ºF, remove from the oven. The final step in this recipe will bring the chicken to the perfect temperature (it needs to be at least 165ºF) without being dry and overcooked.
REDUCE THE SAUCE AND FINISH
- Remove the chicken from the sauce onto a plate and set aside.
- Put the sauce on medium high heat on the stove and reduce further by another ⅓ or so. Your goal here is to thicken the sauce a bit and intensify the flavors (this will take about 5 minutes).
- Once you have the sauce reduced, remove from the heat and let sit for 3 minutes. Add the butter, 1 tablespoon at a time stirring it in thoroughly.
- Turn your oven to broil and make sure your rack is in the middle of the oven. Add the chicken back into the pan and put the whole thing in the oven for a few minutes to crisp the skin and warm the dish. Carefully remove the pan (obviously the handle will be hot) and serve with the barley pilaf.


Leave a Reply